

An Illustrated Guide to the Spawn Actor Behaviour
 Armelline
Member, PRO Posts: 5,482
Armelline
Member, PRO Posts: 5,482
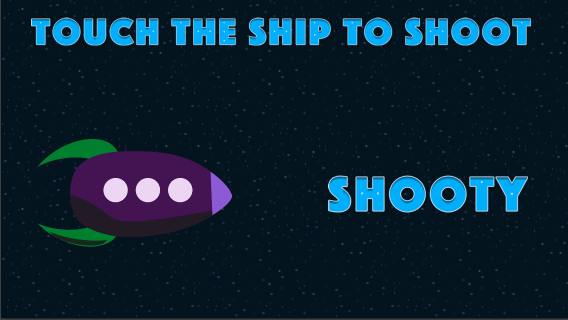
★ The Spawn Actor Behaviour ★

★ Section 1: Actor ★

The Actor dropdown menu allows you to select which actor it is that will be spawned.

All the actors in your project will be available here. They will be ordered in the same order as your actors in the Actors tab in the Inspector.

The actor you choose is the one that will be spawned by the Spawn behaviour. In our case, we want to choose Bullet, as we want to spawn the bullets the ship fires.
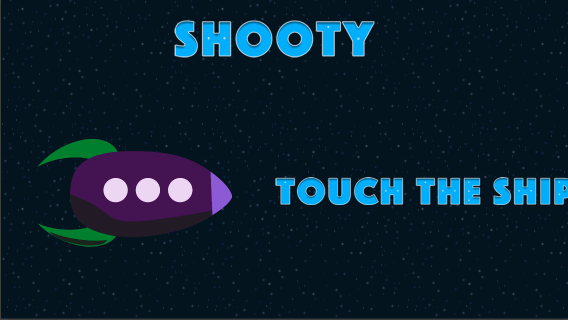
★ Section 2: Layer Order ★

GameSalad allows you to use Layers, a bit like Photoshop. This tutorial isn’t going to go too much into how layers work, but some understanding of them is necessary in order to make proper use of the Spawn Actor behaviour.
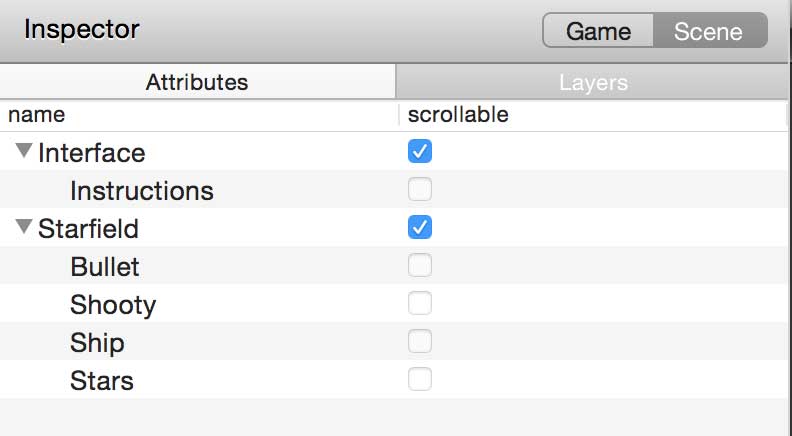
These are the layers we’re going to be using:

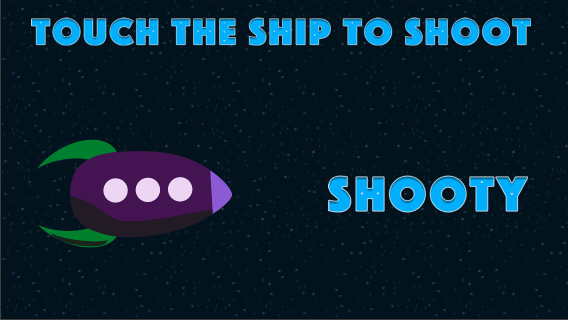
As you can see, on the "Starfield" layer we have a background image, then above that we have the ship, and finally the foremost item is our “Shooty” logo.
We have four options for where in this list we want to spawn the bullet:

We’ll take a look at each one, and see what it means.
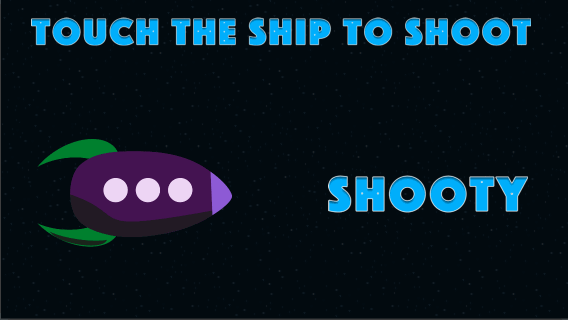
♦︎ Layer Order: In front of actor ♦︎
What this means is the bullet will spawn directly above the ship on the layer list. Anything higher up the layer list than the ship will remain in front of the bullet, and the ship and everything lower down the layer list will be behind the bullet. What it should look like is this:

You’ll notice how the bullet spawns over the top of the ship (in front of the ship actor), but when it moves past the Shooty logo, it goes behind it. This is because the actor has spawned to this position on the layer list:

♦︎ Layer Order: In back of actor ♦︎
What this means is the bullet will spawn directly below the ship on the layer list. The bullet will not be visible when it spawns as the ship will be blocking it from sight. What it will look like is this:

We still see the bullet pass behind the Shooty logo, as it’s lower down the layer list. And we still see the bullet at all, as it’s higher up the layer list than the star-field. However, when the bullet first spawns, it’s hidden from view by the ship actor. If we reduce the opacity of the ship actor so we can see through it, we get to see that the actor is spawning just the same as before, other than being behind the ship:

The bullet is spawning at this location on the layer list:

♦︎ Layer Order: In front of layer ♦︎
What this means is that the bullet will spawn at the front of the current layer - that is, at the top of the layer list for the current layer. This means the bullet is going to spawn above the ship, and will move over the top of the Shooty logo too, as it’s now higher up the layer list.
As the Shooty logo is on the same layer as the ship, the bullet is now spawning above it. The Instructions are on a higher layer, though, so the bullet will still spawn and move behind them.
The bullet is spawning at this location on the layer list:
♦︎ Layer Order: In back of layer ♦︎
What this means is that the bullet will spawn at the back of the current layer - that is behind all the other actors on the same layer. In this case, that’s the ship, the Shooty logo, but also the star-field. When we try shooting a bullet with “In back of layer” selected, we’ll get this very disappointing result:

There was no bullet! You might be tempted to think something went wrong, but this is exactly the result we should have expected. If you take another look at the layers list, and where this bullet spawned on it, you’ll hopefully see why:

The bullet spawned behind the stars! We can confirm this by making the star-field semi-transparent:
Now we can see through the star-field, we can see the bullet has indeed spawned! We could move the star-field to its own, lower layer, and avoid this problem.
Take some time to play around with the layers and spawning options. There’s a lot of flexibility available here, but it can be very confusing! Don’t assume that just because you can’t see the actor you wanted to spawn that it didn’t spawn!
A good tip for keeping track of when things have actually spawned is to make an integer game attribute, and every time you spawn the actor, add one to that attribute. That way you can easily see if a spawn actually took place or not. Take a look at the example project to see how I did it - it’s very easy! See it in action below (the background becomes increasing transparent so you can see the spawns):

★ Section 3: Direction ★

♦︎ Relative to: actor ♦︎
When you spawn an actor, you can have it point in a specified direction (rotation). This effect is more obvious with larger actors or actors that are moving. A direction of 45 will give you the effect shown below. As with all directions in GameSalad, 0 is right, 180 is left, 90 is up and 270 is down.

In the example below, the rocket rotates slowly. The new actors are spawned matching its rotation, so they will continue to fire out the front of the rocket.

If you change the direction, the adjustment will be consistently applied as the spawning actor’s rotation changes.

♦︎ Relative to: scene ♦︎
You can also spawn actors pointed in a specific direction that is relative to the scene - in other words, a consistent, unchanging direction. Even if the spawning actor changes its rotation, the spawned actor will still point in the specified direction.
♦︎ Towards touch position ♦︎
If you want the spawned actor to be pointed in a particular direction, for example the touch position, you can set the Spawn Actor behaviour to “Relative to: scene”, and then use the following function in the Direction box. You need to be sure to open the Expression Editor and input it into there:

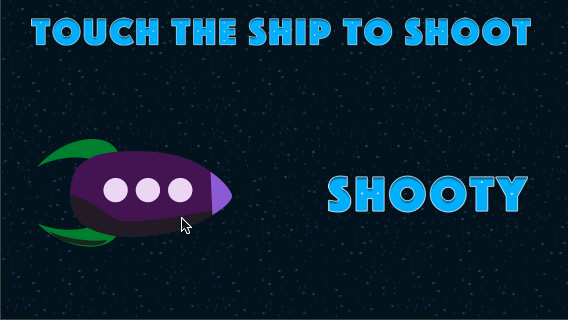
If you try this out in the demo project, remember that you have to touch the spaceship to fire!
♦︎ Towards co-ordinates from attributes ♦︎
This function can easily be adapted to use any attributes containing X and Y co-ordinates. Just replace the game.Touches.Touch 1.X and game.Touches.Touch 1.Y to the relevant attributes.

In this example, two game attributes are being constrained to the location of an enemy. and the direction is being set to point towards those co-ordinates. Wherever the enemy is, that’s the direction the bullets will travel towards.

★ Section 4: Position ★

♦︎ Relative to: actor ♦︎
You may have noticed that so far the bullets have been spawning in the centre of the ship. Ideally, we’d prefer the bullets spawn at the nose of the ship, where the gun (presumably) is. Luckily, we have the ability to spawn actors any distance we want from the centre of the spawning actor. Let’s look at a silly but illustrative example:

As you can see in this example, the bullets are spawning 150 pixels to the right of the spawning actor’s centre, and 80 pixels above it. Even if the ship moves, the bullets will still be spawned this distance from the actor.

♦︎ Relative to: scene ♦︎
If you want to spawn your actor in the same place every time, regardless of where the spawning actor is, you can tell it to spawn the actor “Relative to: scene”. When this is selected, the actor will spawn at the given co-ordinates no matter where on (or off) the scene the spawning actor is. This is particularly handy for when you don’t want the spawning actor to be seen - you can place an actor out of sight off the scene and still spawn actors that will be visible on the scene. In the example below, the bullets will spawn at the centre of the scene - 284,160, and the position of the spawning actor has no effect on it.

♦︎ Spawn at touch position ♦︎
The position the bullets spawn at doesn’t have to be static, but can still be independent of the spawning actor. In this example we’ll spawn the actor at the location of the touch.


♦︎ At co-ordinates from attributes ♦︎
You’re not limited to spawning actors at a predefined location or the touch location - you can spawn them at any location contained in attributes. In this last example, the bullets will always spawn at the current location of the enemy actor, which is constrained to the same two game attributes we saw before.

★ Section 5: Project File ★
The project file used in this guide is attached, and can be downloaded here. I've put some information in the rule names, but I haven't added any extensive commentary to the project. There are a fair few disabled rules in the project - be careful not to enable more than one Spawn Actor behaviour at once!
All artwork is taken from the public domain and is free to use!
Hope you've found this guide useful!
Comments
this is sweet bruh - I worry these guides will get lost in the forums. is there a wiki you can make?
Whoa!!! Dude, this is awesome, thanks. I do like the way you articulate. Everything is so clear. I think you would be a great person to look over a game before pushing go on it. I'm not close to publishing a game yet, I really wouldn't want to cheat myself out of trying to figure out first on my own. But it would be great to have someone look it over in the end, do you do that sort of thing? I would be interested, You posted your rates somewhere on the forum, did you not?
Fantastic (again) ! If I had guides like this when I started out it would have been so much easier, guides with moving examples illustrating the effects of each action are absolutely perfect for learning !
Super @Armelline !
another fantastic tutorial, i stickied it to the top of the tutorials subform
Thanks guys! I'll start working on another one next weekend, if I have time!
Excellent. I agree with Socks - if we had this type of in depth information when we started, how it would have accelerated out learning. Great job, sir!
Nice!
the good stuff") ! and believe me, I've been reading tutorials an all kind of forums: Blender's ; GIMP's ; Unity ; Sculptris etc. , I know what I m saying.
! and believe me, I've been reading tutorials an all kind of forums: Blender's ; GIMP's ; Unity ; Sculptris etc. , I know what I m saying.
Thanks!